
Using Flash in Wildlife Photography to Light Your Subject
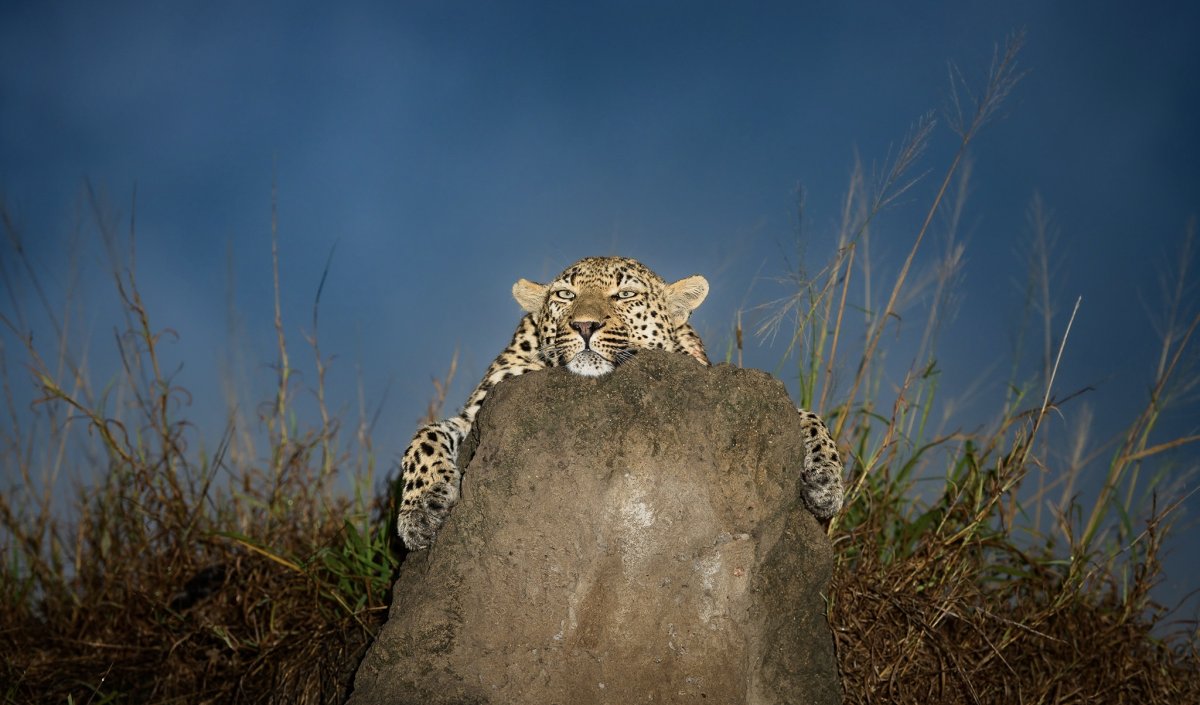

Flash works best in wildlife photography when it supports natural light rather than overpowering it. When using flash in wildlife photography, bird photographers can start with TTL mode and flash compensation between -0.7 and -1.7 EV, adding just enough light to lift the subject. In low light, flash can illuminate an animal while the camera exposure preserves the surrounding scene.
It’s natural to wonder whether flash will make a wildlife image look harsh or disturb the subject. The key is how much light reaches the animal, the distance, and whether the scene calls for subtle fill or a more deliberate lighting effect. Learn when fill flash can help with birds, how distance affects illumination, and how flash can support low-light images without losing the scene’s atmosphere.
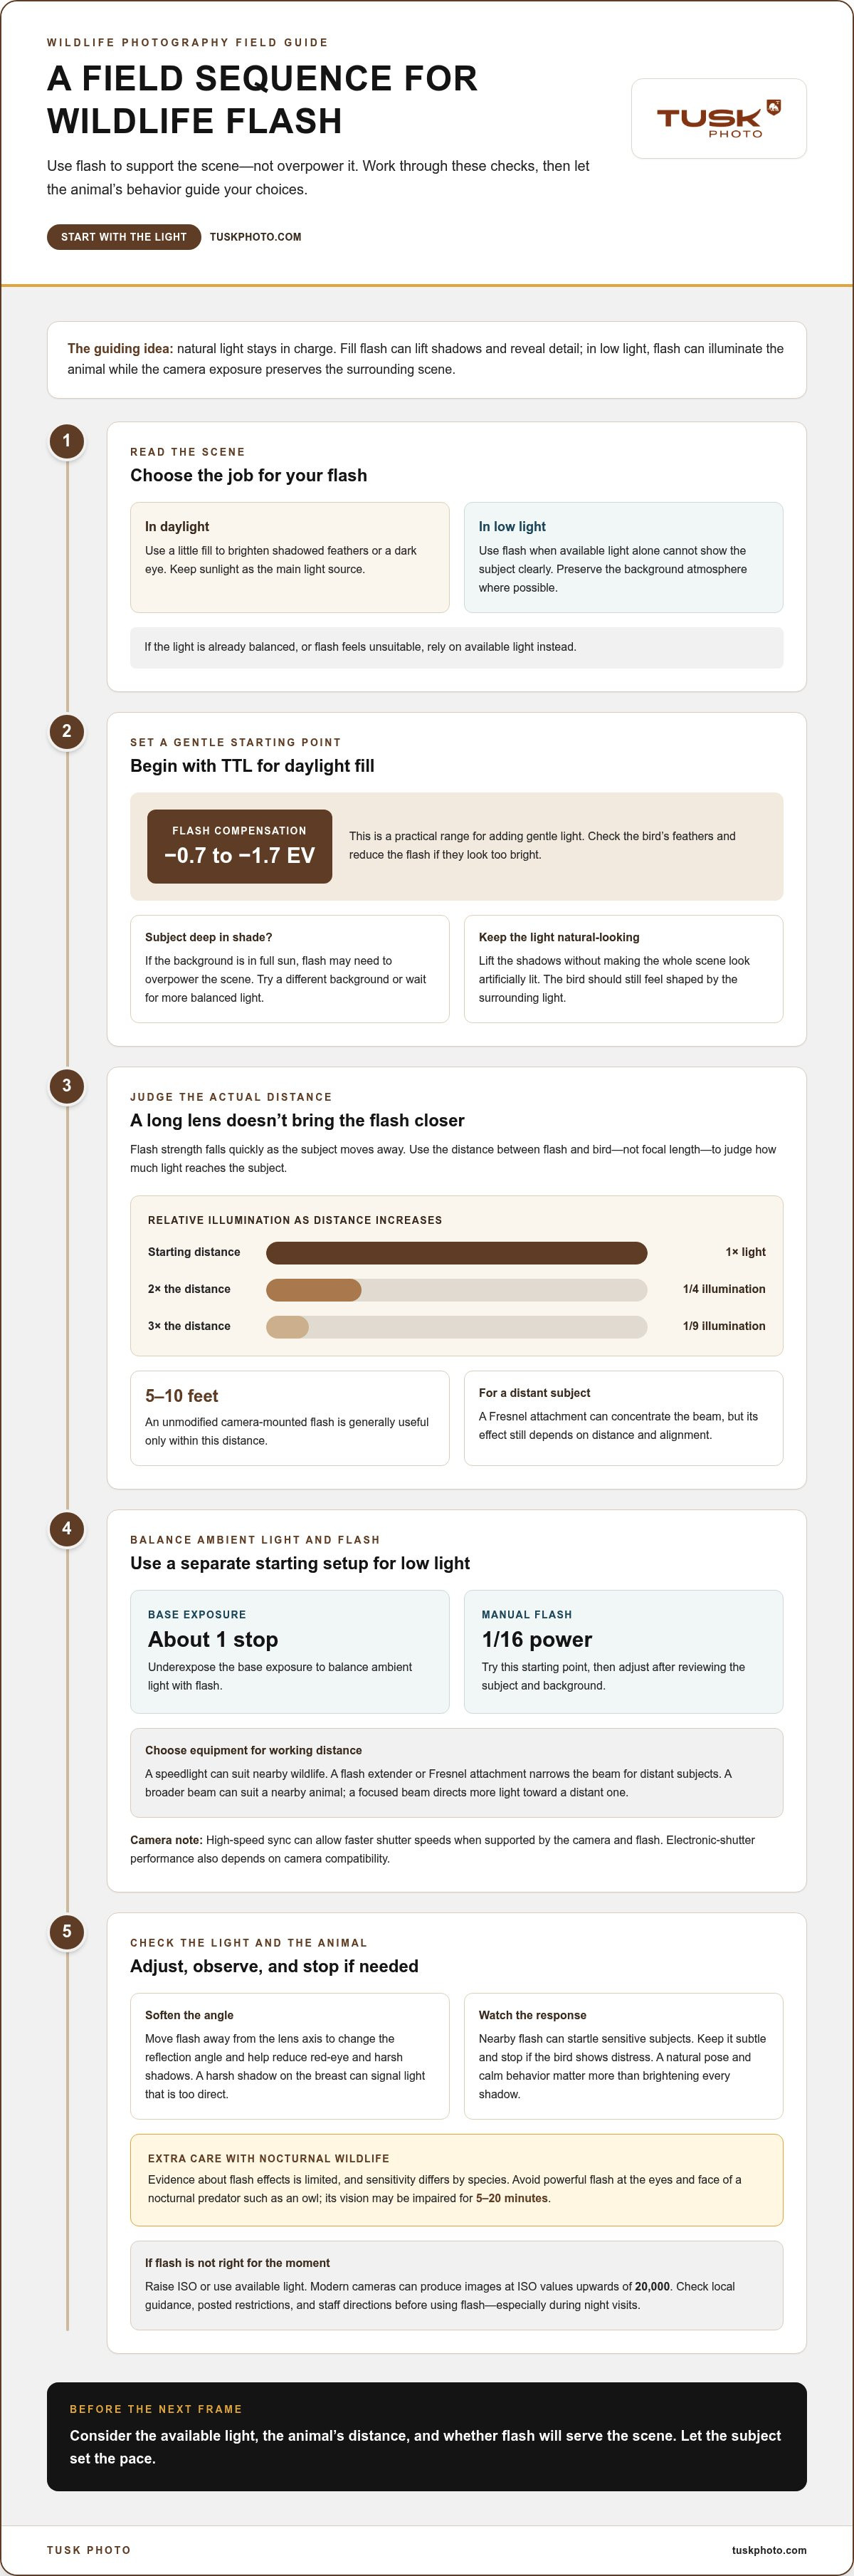
Bird photographers use fill flash to add a little light while keeping daylight as the main source. Used carefully, it can reveal feather detail and help a bird stand out from its surroundings. When using flash in wildlife photography, aim for subtle support, not a visibly flash-lit scene.
Fill flash is a low-powered burst that brightens shadowed parts of a bird without replacing the scene’s natural light. It can reveal detail in a dark eye or shaded feathers and help colors appear more vivid. For a bird beneath leafy branches, subtle flash can lift the shadows without making the whole scene look artificially lit. Keep the effect restrained so the bird still appears shaped by the surrounding light.
In daylight, fill flash balances shadows on the bird while sunlight remains the primary light source. It can add definition when the bird faces away from the sun or sits against a bright setting. Start in TTL mode, then set flash compensation between -0.7 and -1.7 EV. This gives you a practical starting range for adding gentle light; review the bird’s feathers and reduce the flash if they look too bright. This is a useful starting point when using flash in wildlife photography during bright conditions.
Watch the background as well as the bird. If the background is in full sun while the subject is deep in shade, flash may need to overpower the scene, producing an unnatural result. Instead, look for a different background or wait for more balanced light. This often preserves a natural relationship between the subject and its setting.
Low-powered fill flash is generally considered safe for birds and animals, but nearby flash can startle sensitive subjects. Keep the light subtle, watch the bird’s response, and stop if it shows distress. A natural pose and calm behavior matter more than brightening every shadow.
Flash light fades quickly as the subject moves farther away. With a telephoto lens, judge the distance between flash and bird, not focal length. To reduce red-eye and harsh shadows, move the flash away from the lens axis.
Flash distance is the space between the flash and subject, and it determines how much light reaches the animal. Double the distance, and the subject receives one-quarter of the illumination; at three times the distance, it receives one-ninth. This rapid falloff matters with distant birds, where a camera-mounted flash may add little light.
An unmodified camera-mounted flash is generally useful only within 5-10 feet. A telephoto lens brings a distant bird closer in the frame, but it doesn’t bring the flash closer to the bird. For a far subject, a Fresnel attachment can concentrate the flash beam, though its effect still depends on distance and alignment. Check the subject’s exposure rather than assuming a long lens extends flash reach.
Red-eye occurs when flash reflects from the eyes toward the camera, while a small, direct flash can cast hard shadows. Moving the flash off the camera’s axis changes the reflection angle and can create more natural-looking light. For a bird beside a branch, an off-camera position can also move the branch’s shadow away from its face.
Avoid pointing the light straight at the bird, and use only enough flash to lift the subject. With a nearby bird, adjust the flash position and review the eye and feather shadows between frames. A harsh shadow on the breast signals that the light is too direct. Changing the flash angle may help make the light look softer.
Using flash in wildlife photography can reveal an animal in dim conditions while preserving the background. The key is deciding whether flash or available light will best capture the moment.
A speedlight is a flexible choice for nearby wildlife; a flash extender or Fresnel attachment narrows its beam for distant subjects. Choose based on working distance and the light needed. A broader beam can suit a nearby animal, while a focused beam directs more light toward a distant subject. The right setup helps shape illumination without changing the background exposure.
Rules vary between parks and wildlife areas, so read local guidance before photographing. Follow posted restrictions and staff directions, especially during night visits. Before setting up, find out whether the location has specific limits on flash use. Using flash in wildlife photography means respecting both the rules and the animal’s behavior.
Use flash when available light alone can’t show the subject clearly. For balanced ambient light and flash, underexpose the base exposure by about 1 stop, then try manual flash at 1/16 power. Adjust after reviewing the subject and background. High-speed sync can allow faster shutter speeds when supported by the camera and flash. Electronic-shutter performance also depends on camera compatibility.
Evidence about flash effects on animals is limited, and sensitivity appears to differ by species. Avoid directing powerful flash at the eyes and face of a nocturnal predator such as an owl, since its vision may be impaired for 5-20 minutes. For a scene where flash feels unsuitable, raise ISO or use available light; modern cameras can produce images at ISO values upwards of 20,000.
Tusk Photo’s Scheduled Tours take photographers to wildlife destinations with experienced guides and dedicated photographic opportunities. These journeys can suit beginners building confidence with techniques such as fill flash, as well as experienced photographers refining their approach in the field.
If you have a particular destination or photographic goal in mind, Tusk Photo’s Tailor Made Tours and On Demand Tours offer other ways to shape a wildlife photography journey. Choose a planned departure or a trip designed around your interests.
Explore Tusk Photo’s scheduled tours or visit tuskphoto.com to learn more.
Let each encounter guide your lighting choices. Before the next frame, consider the available light, the animal’s distance, and whether flash will serve the scene. A thoughtful approach to using flash in wildlife photography leaves room for natural behavior and the atmosphere that drew you to the subject.
Then take that curiosity somewhere new. A carefully planned wildlife photography journey can give you time to observe, compose, and make deliberate choices in the field. If you’re ready to explore what that could look like, contact Tusk Photo to discuss your photography journey. Keep learning with each encounter, and let the subject set the pace.
Flash exposure compensation adjusts flash output while the camera remains in TTL mode, which automatically meters the flash. Positive compensation adds flash light; negative compensation reduces it. For example, if a bird’s pale feathers look washed out, lower the compensation and take another frame. This changes the flash contribution, not the camera’s ambient-light exposure.
High-speed sync can allow faster shutter speeds when supported by both the camera and flash. Electronic-shutter performance depends on camera compatibility.


