
The Ultimate Guide to Photographing Wildlife in the Rain
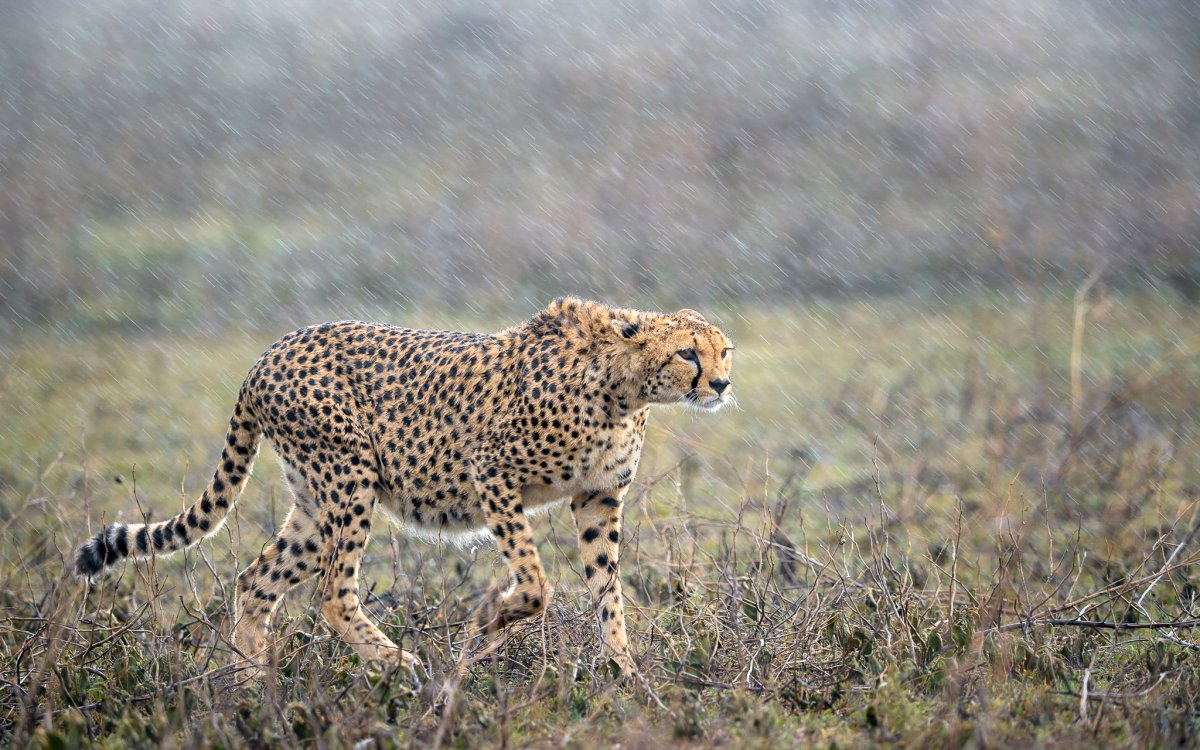

For rain photography with wildlife, protect your camera with a rain cover, use a lens hood, and keep microfiber cloths ready to clear moisture. Start around f/4 to f/5.6 for a wildlife subject, then try f/8 when you want more raindrops in focus. Choose a fast shutter speed to freeze falling drops or a slower one to turn them into streaks.
Rain can make wildlife photography more challenging: water can blur the lens, while low light makes movement harder to capture. But wet feathers, shining leaves, mist, and falling snow can also give an image a strong sense of place. This guide shares practical ways to protect your gear, keep the lens clear, and adjust aperture and shutter speed to suit the scene. You’ll also learn how to photograph wildlife in rain, fog, and snow while caring for your equipment and the animals.
Carry a rain cover, lens hood, and several microfiber cloths to protect your camera and clear the lens. Give birds sheltering from wet weather plenty of space, and don’t disturb or stress them.
•
Fit a rain cover before the weather turns, then check that you can still operate the camera controls. Keep a lens hood on to deflect drops, but don’t rely on it for waterproof protection. Rain can damage photographic equipment, so cover both the camera and lens while shooting. After a damp outing, place silica packs in your camera bag to absorb moisture.
•
Pack several microfiber cloths in a sealed bag, with one within easy reach. Use a clean, dry cloth to wipe the front element when drops reduce contrast, and avoid dragging grit across the glass. Keep used cloths separate: a wet one won’t clear the lens effectively. Check the front element between frames, especially when wind drives rain toward the camera.
•
Prepare for low light before an animal appears. Start around ISO 800 to 3200, then raise ISO when needed for a faster shutter speed or wider aperture; higher ISO also adds image noise. If the subject is still, a tripod can steady the camera at a slower shutter speed. Watch for movement and favor a faster shutter when the animal shifts. Keep your cloths ready for quick lens checks.
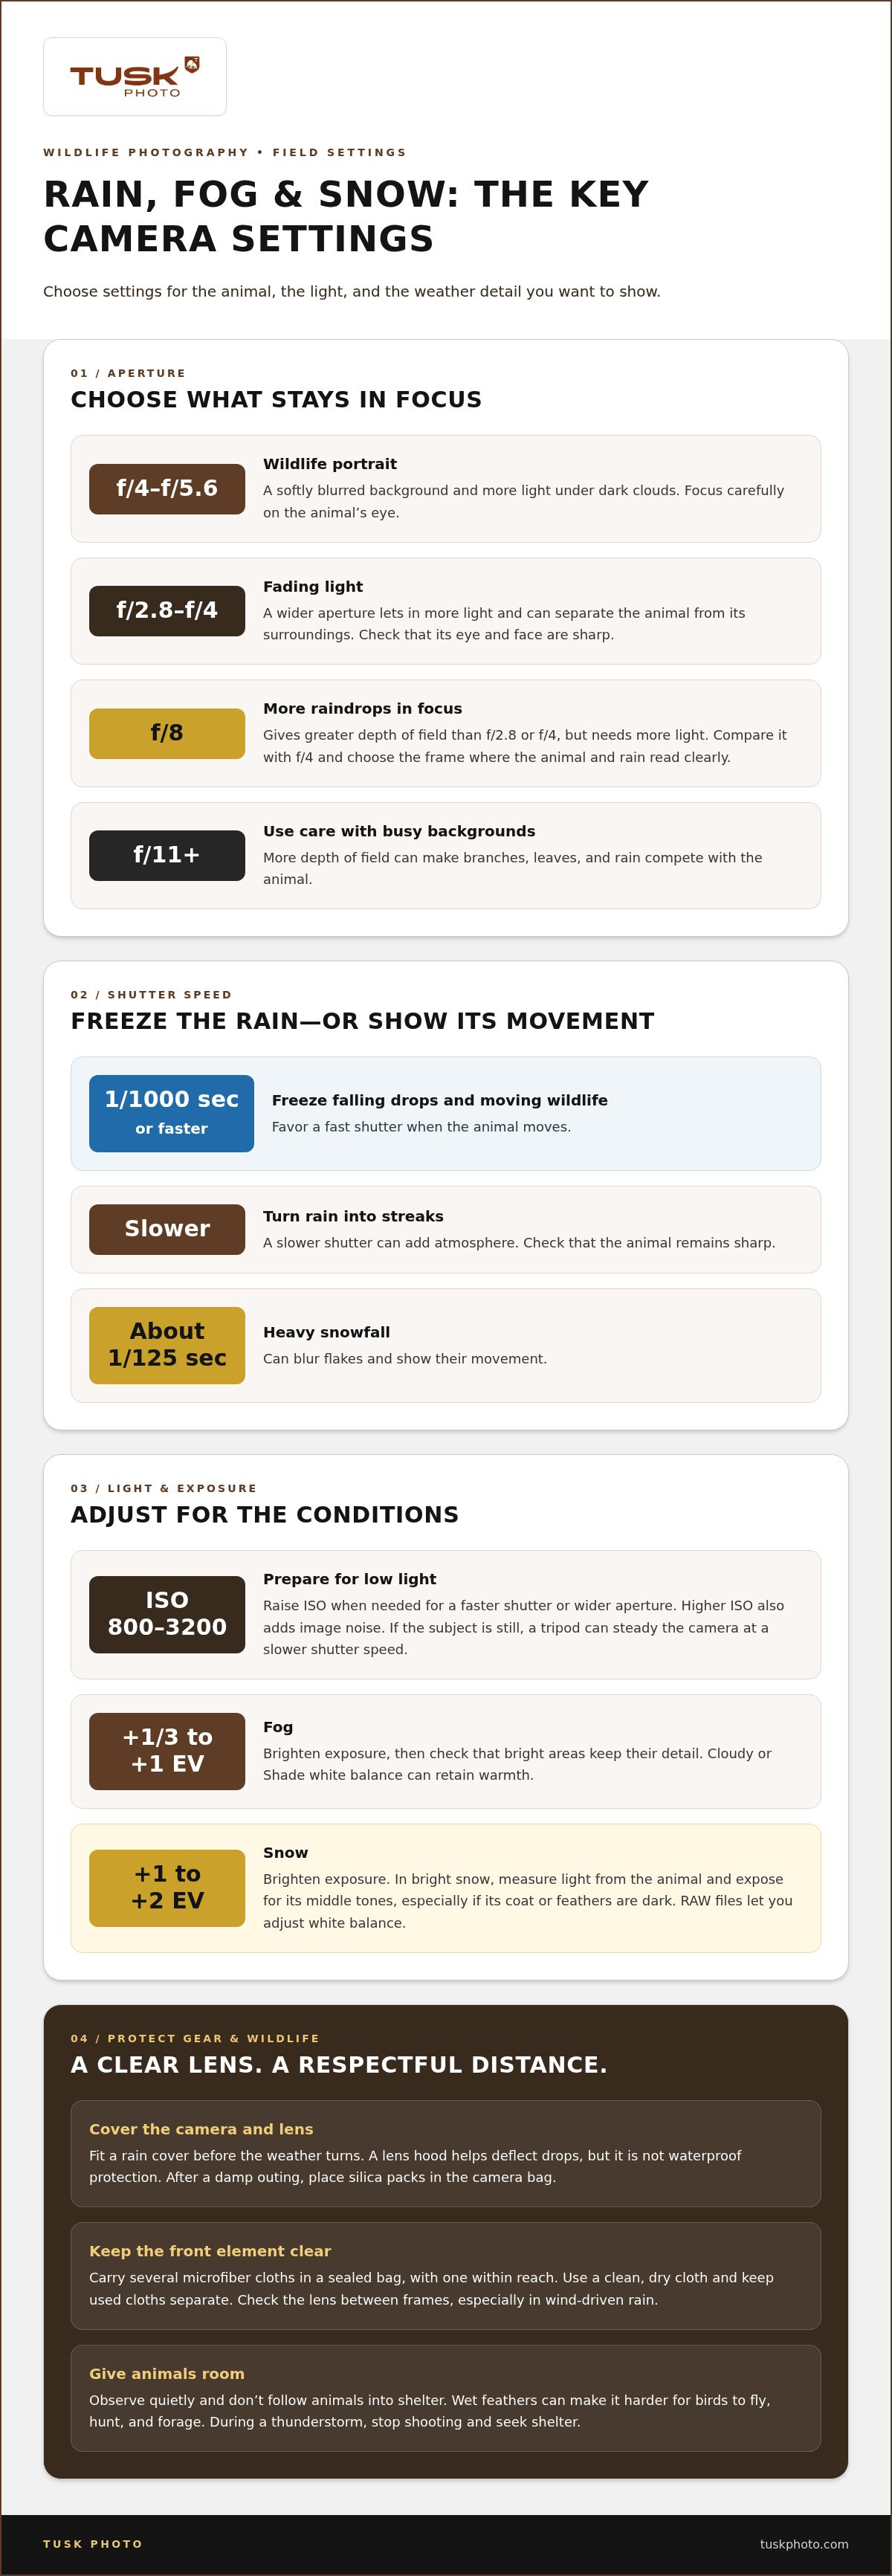
Choose an aperture based on whether the animal or the rain should dominate the frame. Adjust it as clouds dim the light or raindrops become a key detail.
• Start at f/4 to f/5.6 for a wildlife portrait with a softly blurred background. These settings let in more light than narrower apertures, which helps under dark clouds. Focus carefully on the animal’s eye: at a wide aperture, the sharp area can be shallow, so small focus errors matter.
• Open to f/2.8 or f/4 when light is fading and you want the animal to stand apart from its surroundings. A wider aperture admits more light, but it may leave only a small part of the subject sharp. Check the animal’s eye and face in playback before continuing.
• Try f/8 when you want more raindrops across the scene to appear in focus. This middle ground gives greater depth of field than f/2.8 or f/4, but it needs more light for a correct exposure. If the image looks too dark, adjust your exposure rather than assuming the aperture alone will solve it.
• Avoid f/11 or narrower when the background is busy. Greater depth of field can make branches, leaves, and rain compete with the animal. Compare a frame at f/8 with one at f/4, then choose the version where the subject and raindrops read clearly. For close raindrops on a natural detail, such as a leaf, focus on the drops you want sharp.
Adapt your approach to the weather and the animal’s behavior. In rain photography with wildlife, patience and a clear view matter as much as camera settings.
• During a thunderstorm, stop shooting and seek shelter rather than staying exposed for a photograph. In heavy rain, don’t approach or pressure animals. Wet feathers can make it harder for birds to fly, hunt, and forage, so give them space to rest and move naturally.
• Match shutter speed to the action. Use 1/1000 seconds or faster to freeze raindrops and moving wildlife. A slower shutter speed can make falling rain appear as streaks. A slower shutter can add atmosphere, but check that the animal remains sharp.
•
Look for wildlife near natural cover, such as trees and bushes where birds may shelter from rain. The right place and season depend on local weather and animal behavior, so observe quietly before choosing a position. Rain photography with wildlife works best when you can watch without disturbing your subject. Leave animals room to move, and don’t follow them into shelter for a closer frame.
•
Increase contrast when rain or fog makes an image look washed out. Apply that change to the animal, rather than the whole scene, to help it stand out naturally. In fog, brighten the exposure by +1/3 to +1 EV, then check that bright areas retain detail. For snow, brighten by +1 to +2 EV and use RAW files to adjust white balance.
• For fog, choose Cloudy or Shade white balance to retain warmth. Against bright snow, measure light from the animal and expose for its middle tones, especially when its coat or feathers are dark. During heavy snowfall, about 1/125 seconds can blur flakes and show their movement.
Tusk Photo’s Scheduled Tours take photographers to wildlife destinations with experienced guides. These expeditions let you practise the techniques in this guide, from adapting camera settings to reading changing weather while observing wildlife respectfully. They offer photographic opportunities for beginners and seasoned professionals alike.
For a specific destination or photographic goal, Tusk Photo also offers Tailor-Made Tours and On-Demand Tours. Choose the format that suits your plans, whether you prefer a scheduled departure or a journey designed around your interests.
Explore Tusk Photo’s tours and choose the format that suits your wildlife photography plans.
Let changing weather shape your next photographic goal. A rain-softened forest, drifting fog, or fresh snowfall can invite a different way of observing wildlife. Before your next outing, choose the kind of scene you want to capture and consider how the conditions might affect your approach. That intention can help you slow down, notice more, and make thoughtful choices in the field.
Rain photography with wildlife rewards patience as much as camera skill. If you’d like to plan a wildlife photography journey around your interests, contact Tusk Photo about your photography. Then take what you’ve learned into the field and stay open to the moments the weather reveals.
Set exposure for the animal, not the overall brightness of a rain-filled frame. First choose a shutter speed suited to the subject’s movement, then adjust aperture and ISO to balance light and depth of field. Review a test frame and check the histogram for clipped highlights, especially when wet fur or puddles reflect a bright sky.
Keep the camera covered while moving between shooting spots, and avoid changing lenses in open rain. Before leaving a sheltered vehicle or building, have your rain cover ready so you can protect the camera promptly. When you return indoors, let cold equipment warm gradually inside a closed camera bag. This helps limit condensation as temperatures change.
Rain can change where animals pause and how clearly you can see them. Watch from a respectful distance, and use breaks in the rainfall to find a clear view. Wet surfaces may catch bright reflections, while falling rain can soften detail across the frame. Look for a darker, uncluttered background to help the animal stand out.
Use continuous autofocus for a moving animal, placing a small focus area over a clear part of its body. If rain crosses the frame, focus through a gap so nearby drops don’t distract the camera. For a stationary subject, switch to a single focus point, steady your framing, and take several frames.
Keep the front glass dry, and avoid breathing directly onto it while framing a shot. If fog appears inside the lens, don’t repeatedly wipe the outer surface; give the equipment time to adjust to its surroundings. Before moving from cold outdoor air into a warm space, cap the lens and seal the camera in its bag until temperatures begin to equalize.


