
Norway Orca Photography Tour: How to Photograph Orcas in Arctic Waters
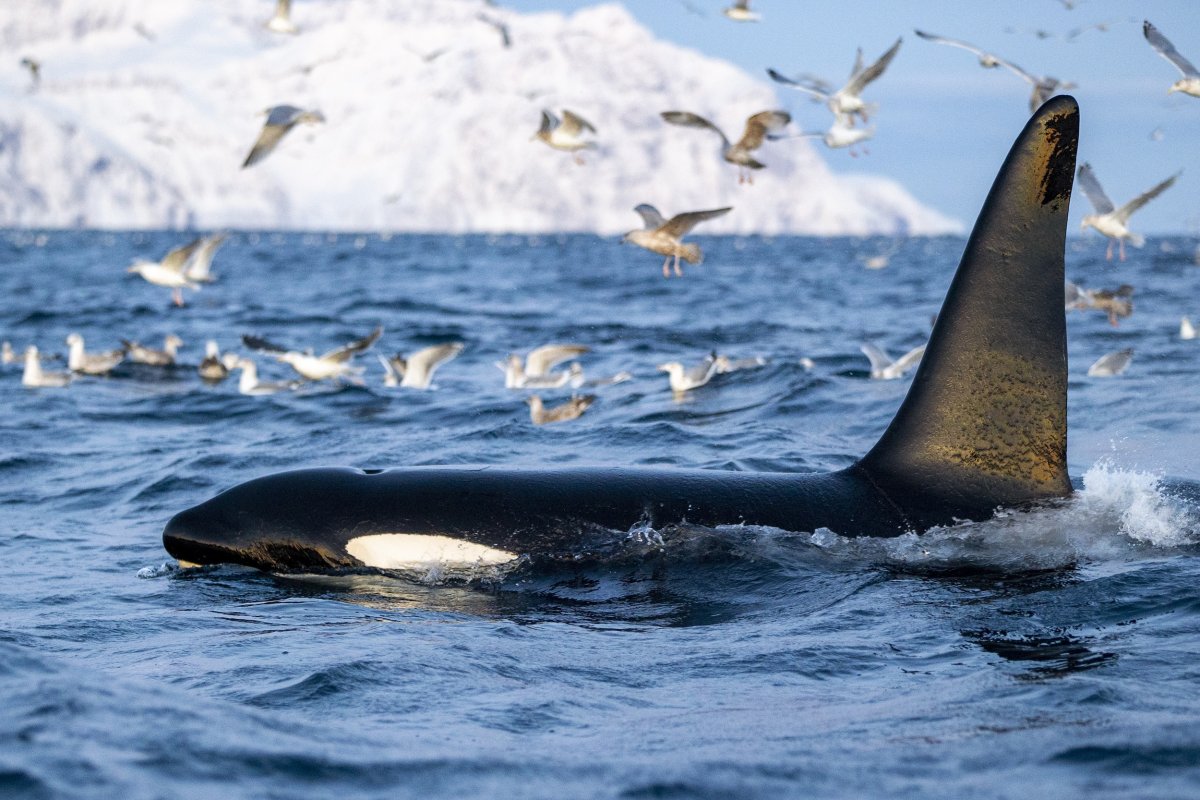

What if your strongest orca photograph begins before an orca appears? On a Norway orca photography tour, Arctic light can shift quickly, the boat may move beneath you, and wildlife never follows a script. You may be wondering which camera settings to use, how to protect your gear from cold and spray, and how to photograph moving animals without disturbing them.
Good images start with preparation, patience, and a willingness to adapt. This guide covers what to bring, how to make practical camera choices on the water, and how to work with changing light while keeping orca welfare in mind. An experienced guide can support your learning in the field, leaving you more time to observe carefully and make thoughtful photographs.
An orca photography trip brings together wildlife observation, photography from a boat, and natural light that can change as the day unfolds. The scene is always moving: an animal may surface at a different distance than expected, the boat may shift, and clouds or twilight can alter the light. Approach a Norway orca photography tour as time spent observing and responding, not as a promise of a particular encounter or image.
Keep your expectations flexible. Orcas are wild animals, so sightings and behavior can’t be guaranteed. Weather can affect time on the water, while changing light may call for a different approach to the same scene. In northern Norway’s darkest months, daylight is limited. Late October to mid-November can offer more favorable light for photography, but conditions still vary from day to day.
Patience matters more than memorizing a camera setting. A preset can be a useful starting point, but it can’t account for every change in distance, movement, or light. Stay ready to adjust, and leave room for moments that don’t match the composition you imagined.
A boat is a moving platform, and the distance to an orca can change while you’re framing a photograph. Keep your balance, give yourself time to respond, and look up from the camera regularly. Watch the animals and the surrounding water as well as your settings. Noticing the direction of movement can help you anticipate where to point your camera without rushing or crowding the moment. If you’re new to wildlife photography, observation and patience are a good place to start.
A little preparation helps you respond to a moment instead of searching through menus. Before your Norway orca photography tour, run through this simple check:
Check that the camera and lens work as expected. Practise changing the controls you use most, including focus and exposure.
Cold conditions can affect battery life, so start with fully charged batteries and bring any spares you already use.
Make room for new photos before you leave, so you’re not sorting through files while wildlife is nearby.
Prepare clothing for cold, wet conditions, and a way to shield your camera from spray when it’s not in use.
Keep the main controls easy to reach. Before heading out, make sure you know how to adjust focus and exposure without digging through menus. When an animal surfaces briefly or the light changes, a quick adjustment can matter more than a complicated setup.
Start with shutter speed, focus, and exposure. A faster shutter speed can help reduce blur from animal or boat movement, but it also lets in less light, so the right choice depends on the scene. Continuous focus keeps adjusting as your subject moves. Practise tracking a moving person or bird before your trip, and learn how to move the focus point quickly. Exposure controls how bright or dark the image looks, so check your results and adjust as the light changes. There’s no single setting recipe for every moment.
On a guided wildlife photography expedition, experienced guides lead the trip and provide photographic opportunities in the field. Explore guided wildlife photography tours to see the available tour formats.

Let the encounter set the pace. Rather than waiting for one perfect close-up, build a varied set of photographs as opportunities arise. Start with the wider scene, then look for natural behavior. Include the surrounding water, coastline, or changing light to show where the moment happened. You may not get every kind of image, and that’s fine. A thoughtful sequence can tell a fuller story than a single tight frame.
Observe first. Keep your camera ready, but don’t let the viewfinder become your only view of the animals. Follow your guide’s instructions and give wildlife room. Never try to direct an encounter or push closer for a photograph. Calm observation helps you notice how the scene changes and choose a frame without rushing.
If close-up images aren’t possible, widen your composition. A dark fin against textured water, an orca moving through a broad fjord scene, or soft light reflected on the surface can all make compelling photographs. Look for what the moment offers rather than treating distance as a problem. The setting can carry the image.
A guided trip gives you structure in the field, with experienced guides leading the photography expedition and helping you focus on observing and making images. On a Norway orca photography tour, stay open to a different pace or composition than you first imagined. The animals, conditions, and light shape each opportunity.
To explore how guided departures are arranged, browse the scheduled photography tour dates. Choose a trip that leaves room for learning, patience, and respect for wildlife.
Let your next goal be simple: arrive ready to notice, learn, and adapt. A Norway orca photography tour can be a chance to grow your skills in a remarkable setting, but strong images often come from staying open to what the day offers rather than chasing one result.
Tusk Photo’s wildlife photography expeditions are led by experienced guides and include scheduled, tailor-made, and on-demand formats. Each offers a way to focus on photography while learning in the field. Explore guided wildlife photography tours and find an expedition that fits the kind of experience you’re looking for.
Prepare carefully, give wildlife space, and let your eye grow with every moment on the water.
The main season for orca sightings in Northern Norway is generally late October through January, when orcas follow herring into the fjords. This can help you choose a travel window, but it can’t promise a sighting on any particular outing. Wild animals move freely and conditions can change, so keep your plans flexible and enjoy the wider experience of being on the water.
Consider shooting in RAW if your camera offers it and you’re comfortable processing images later. RAW files preserve more image information, giving you room to adjust brightness and color when editing. If you prefer ready-to-share photos with little editing, JPEG may suit you better. Whichever format you choose, take a few test shots before the trip to make sure your workflow feels manageable.
Yes. Beginners can join, and Tusk Photo’s tours are designed for photographers at different experience levels. You don’t need a portfolio or years behind a camera to enjoy the experience. Set a personal goal that feels achievable, such as making a few clear photographs that capture the atmosphere of the outing, rather than measuring success by one rare action shot.
Keep your camera securely attached when you’re using it, with a strap that fits comfortably and doesn’t get in the way of your movement. When you put it down, choose a stable, protected spot rather than leaving it loose on a seat or deck. If you move between cold outdoor air and a warm cabin, let the camera warm gradually inside a closed bag to help limit condensation.


