
How to Photograph Wild Orangutans in Borneo: A Practical Field Guide


What if the strongest orangutan photograph begins with waiting rather than shooting? A Bornean orangutan photography tour calls for working with the rainforest, not against it. Dense foliage, uneven light and brief or partly hidden encounters can make exposure and focus tricky. A few simple habits can help you respond calmly and make natural, expressive images.
It’s understandable to want to be ready when an orangutan appears. This guide covers how to prepare your camera, respond to changing light and movement, and photograph with respect for the animal. It also explains what to consider when choosing a trip format, and how experienced photography guides can help beginners and seasoned photographers make thoughtful choices in the field.
Orangutan photography is about watching and responding, not staging an encounter. On a Bornean orangutan photography tour, take time to notice what the animal is doing and make considered pictures without trying to control the moment.
Let the orangutan set the pace. A close portrait can be tempting, but moving closer or trying to change the animal’s behaviour for a better frame can disturb the encounter. Keep a respectful distance, follow your guide’s direction and accept that an orangutan may remain partly hidden or move away. The photograph should never matter more than the animal’s comfort.
Respectful wildlife photography puts the animal’s well-being and natural behaviour ahead of the image.
Rainforest scenes are layered. Leaves and branches can cross the frame, and a busy background may compete with the orangutan’s face. Light can change just as quickly: a sunlit patch may brighten nearby leaves while the animal stays in shade. Rather than forcing a clear view, watch for a natural opening or a moment that gives the image more meaning, such as the orangutan reaching for food or looking through the foliage. A partly obscured frame can still feel intimate when it shows the animal in its surroundings.
Wild and semi-wild settings are different. In a wild habitat, animals move freely; in a semi-wild setting, human care or management may shape the environment. Neither guarantees a close or lasting view, and behaviour can vary. An experienced photography guide can help you decide when to wait, adjust your position or lower the camera and simply observe.
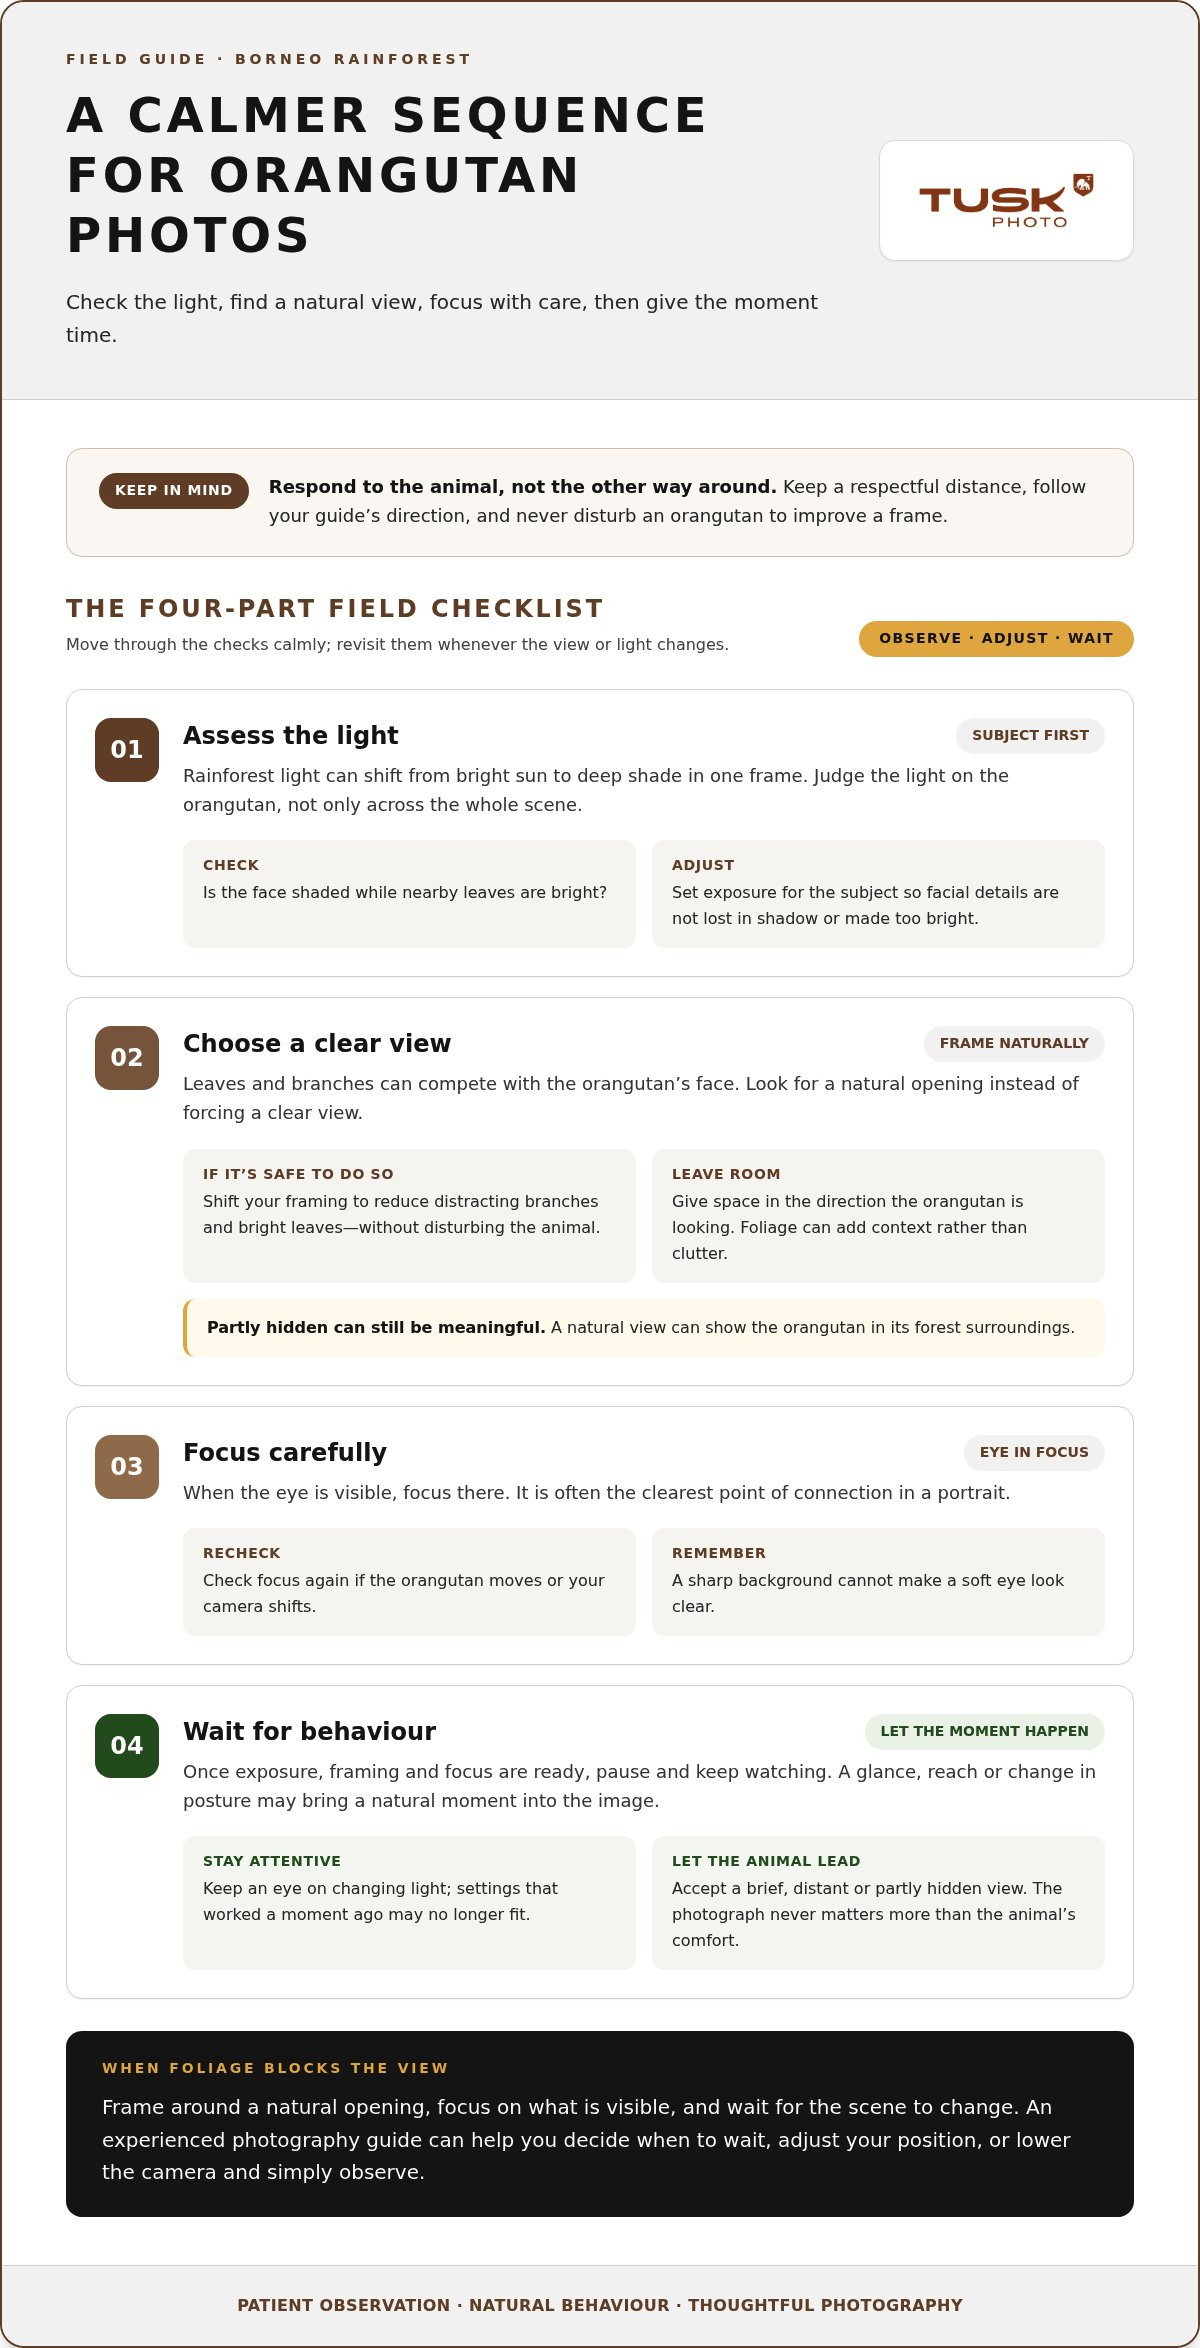
Rainforest light can shift from bright sun to deep shade within the same frame. Check your camera whenever the light or view changes instead of relying on settings that worked a moment ago. On a Bornean orangutan photography tour, this quick sequence can help you respond without rushing.
Look at the light on the orangutan, not just across the whole scene. Is the face in shade while nearby leaves are bright? Is the animal lit against a darker background? Exposure controls how bright or dark the photograph appears. Adjust it for the subject so facial details don’t disappear into shadow or become too bright.
If you can do so without disturbing the animal, shift your framing to reduce distracting branches and bright leaves. Look for a natural opening between leaves, and leave space in the direction the orangutan is looking. A partly hidden view can still work when the foliage adds context rather than clutter.
If the eye is visible, place focus there. It is often the clearest point of connection in a portrait. Recheck focus if the orangutan moves or your camera shifts. A sharp background won’t make a soft eye look clear.
Once your exposure, framing and focus are ready, pause. A glance, reach or change in posture may bring a natural moment to the image. Keep watching the light and adjust as it changes rather than assuming your previous settings still fit.
If foliage blocks the view, frame around a natural opening, focus on what’s visible and wait for the scene to change. Experienced photography guides can help photographers at different skill levels make these choices in the field. Explore guided wildlife photography tours to see how expert guidance can support a thoughtful approach.
Prepare for changing conditions, not a guaranteed photograph. Sightings may be brief, distant or partly hidden, and the light can shift while you wait. Set a flexible goal, such as making a natural portrait or showing an orangutan in its forest surroundings, instead of expecting a particular pose or close view. Careful observation can be rewarding even when it doesn’t lead to a photograph.
Before the trip, practise using your camera’s basic controls so you can adjust focus and exposure without searching through menus. Think about what you want to learn, too. An experienced photography guide can help you read a scene and make practical choices, while leaving you room to watch quietly and respond at your own pace.
A scheduled departure follows a planned expedition, while a tailor-made journey can be shaped around your interests and priorities. Think about whether you prefer a set plan or more room to focus on the wildlife photography you enjoy. Tusk Photo leads guided wildlife photography tours with experienced photography guides for beginners and seasoned photographers alike.
If you’re new to wildlife photography, practise noticing light, choosing a clear view and focusing on your subject before travelling. You don’t need to master every camera setting in advance. Knowing how to make a few basic adjustments can help you respond calmly when a moment unfolds. Keep your expectations open and let the experience guide the images you make.
Explore Tusk Photo’s scheduled, tailor-made and on-demand photography tours to find a format that fits how you like to plan a wildlife photography journey. Sightings and conditions can never be promised.
A Bornean orangutan photography tour is as much about how you observe as what you bring home. Give yourself room to learn, adapt and appreciate moments that may not become photographs. That open-minded approach can make the experience meaningful, whether you’re building confidence behind the camera or refining an established practice.
Tusk Photo’s wildlife photography expeditions are led by experienced photography guides, with scheduled, tailor-made and on-demand formats to suit different ways of planning a journey. Consider which format best fits your interests and approach to photography.
Explore Tusk Photo’s wildlife photography tours and take the next step toward a thoughtful photographic adventure.
There isn’t one best time for every location. Before choosing travel dates, consider the area you hope to visit and its seasonal patterns. Rain and cloud can affect comfort and light, while conditions also change from day to day. Use seasonal patterns to guide your planning, not as a promise of sightings or clear photographic opportunities.
No single lens suits every encounter. The useful focal length depends on the distance to the orangutan, how much foliage blocks your view and whether you want a close portrait or more of the forest in the frame. A zoom lens can make it easier to adjust your framing, but choose equipment you can carry and handle comfortably.
Yes. Beginners can join guided wildlife photography expeditions and build skills through practice. A Bornean orangutan photography tour offers a chance to use your camera in real conditions, starting with simple tasks such as checking focus and adjusting exposure. Guidance can support your learning, but it can’t guarantee a clear view or a particular photograph.
Keep your camera in a closed bag when you’re not using it, and avoid moving it quickly between cool, air-conditioned spaces and warm, humid air. When temperatures change, leaving it in the bag for a while can help reduce condensation. Wipe exterior moisture with a clean, dry cloth, and change lenses in a sheltered spot when practical. These steps reduce risk but can’t prevent all moisture damage.


