
Bad Weather Wildlife Photography Strategies: How to Get Great Shots in Any Condition
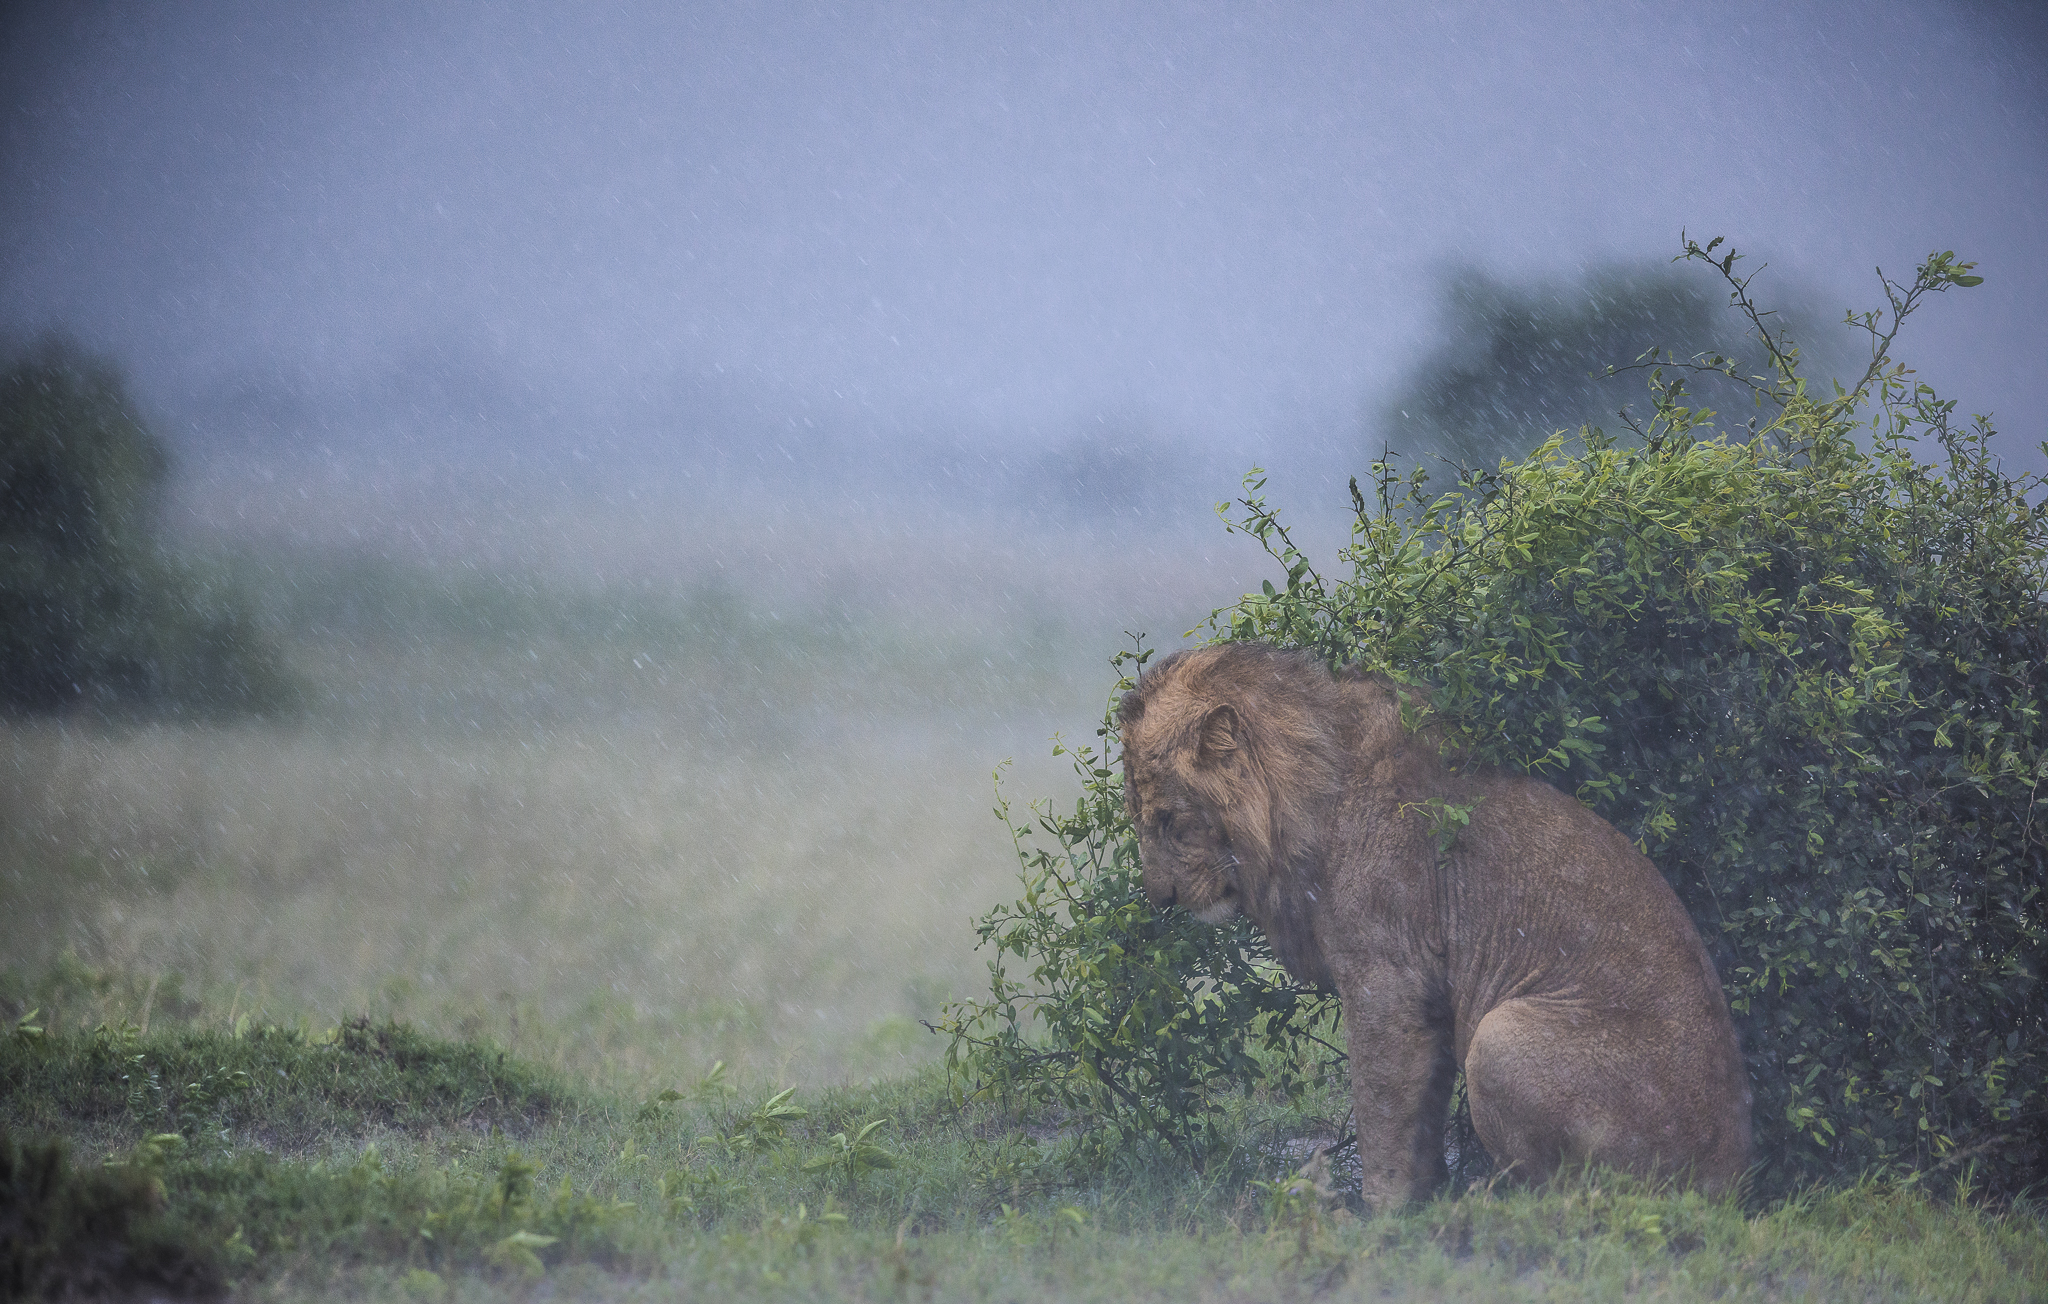

What if the storm clouds rolling across the horizon weren't a signal to pack up, but an invitation to stay? Most of us have felt that sinking feeling when rain starts to fall, making us worry about our expensive gear or the flat light that seems to wash out every shot. But mastering bad weather wildlife photography strategies can turn these moments into your best shots yet.
In this guide, you'll learn how to turn rain, wind, and clouds into your biggest creative advantages. Our expert guides at Tusk Photo find that "bad" weather creates the most unique, moody stories. We'll show you how to protect your equipment with easy hacks and how to embrace the soft light of a cloudy day. Stop packing up and start shooting. You'll gain the confidence to handle any condition and turn every trip into a success.
Many photographers head indoors when the clouds roll in, but they're missing out on some of the best conditions nature has to offer. Think of a grey sky as a giant, natural softbox. It spreads light evenly across the landscape, which is one of the most effective bad weather wildlife photography strategies for capturing professional shots. Without the harsh midday sun, you don't have to deal with deep shadows under an animal's eyes or "blown out" highlights on their fur.
Rain and mist add a layer of mystery that sunny days just can't match. A lion shaking water off its mane or a bird huddled in the rain tells a much more powerful story than a creature simply basking in the sun. Plus, many animals are actually more active when it's cool and damp. Predators might move more freely, and you'll often see behaviors that only happen when the temperature drops. It's about capturing the visceral experience of the wild, not just a postcard image.
When the sun is hidden, colors become incredibly deep and rich. Wet leaves look more vibrant, and the earthy browns of the savannah gain a beautiful saturation. This soft lighting allows you to see every fine detail in feathers and fur that usually gets lost in bright glare. On our scheduled tours, our guides act as mentors to help you spot these subtle details, showing you that a "gloomy" day is actually a gift for your portfolio. You won't have to worry about animals squinting against the light; instead, you get clear, calm portraits with a sophisticated, moody feel that stands out from the crowd.
Keeping your equipment safe doesn't require a fortune. One of the most effective bad weather wildlife photography strategies is using a simple, clear plastic bag or a dedicated rain sleeve. These low-cost solutions keep moisture away from your camera's electronics while letting you see your buttons clearly. Always carry a small microfiber cloth in an easy-to-reach pocket. It's a lifesaver for wiping away stray drops that land on your glass before they ruin a shot. These bad weather wildlife photography strategies ensure your gear stays dry while you focus on the animal.
Your own comfort is just as vital as your camera's safety. If you're shivering or wet, you'll likely pack up before the action happens. Dressing in layers and wearing a reliable waterproof jacket ensures you can stay in the field long enough to catch that perfect moment. On our tailor-made tours, our guides use their deep experience to position the vehicle as a shield against the wind or rain. This provides a dry, stable platform to shoot from.
Start with the basics. A deep lens hood acts like an umbrella for your lens, blocking raindrops from hitting the front glass. In cold weather, remember that batteries drain much faster. Research shows that lithium-ion batteries can lose up to 30% of their power when temperatures hit freezing. Keep a spare battery in an interior jacket pocket close to your body heat to keep it fresh. For more advice on what to pack, check out our Wildlife Photography Tips for Beginners. These small adjustments make a huge difference in how long you can stay out and enjoy the wild.
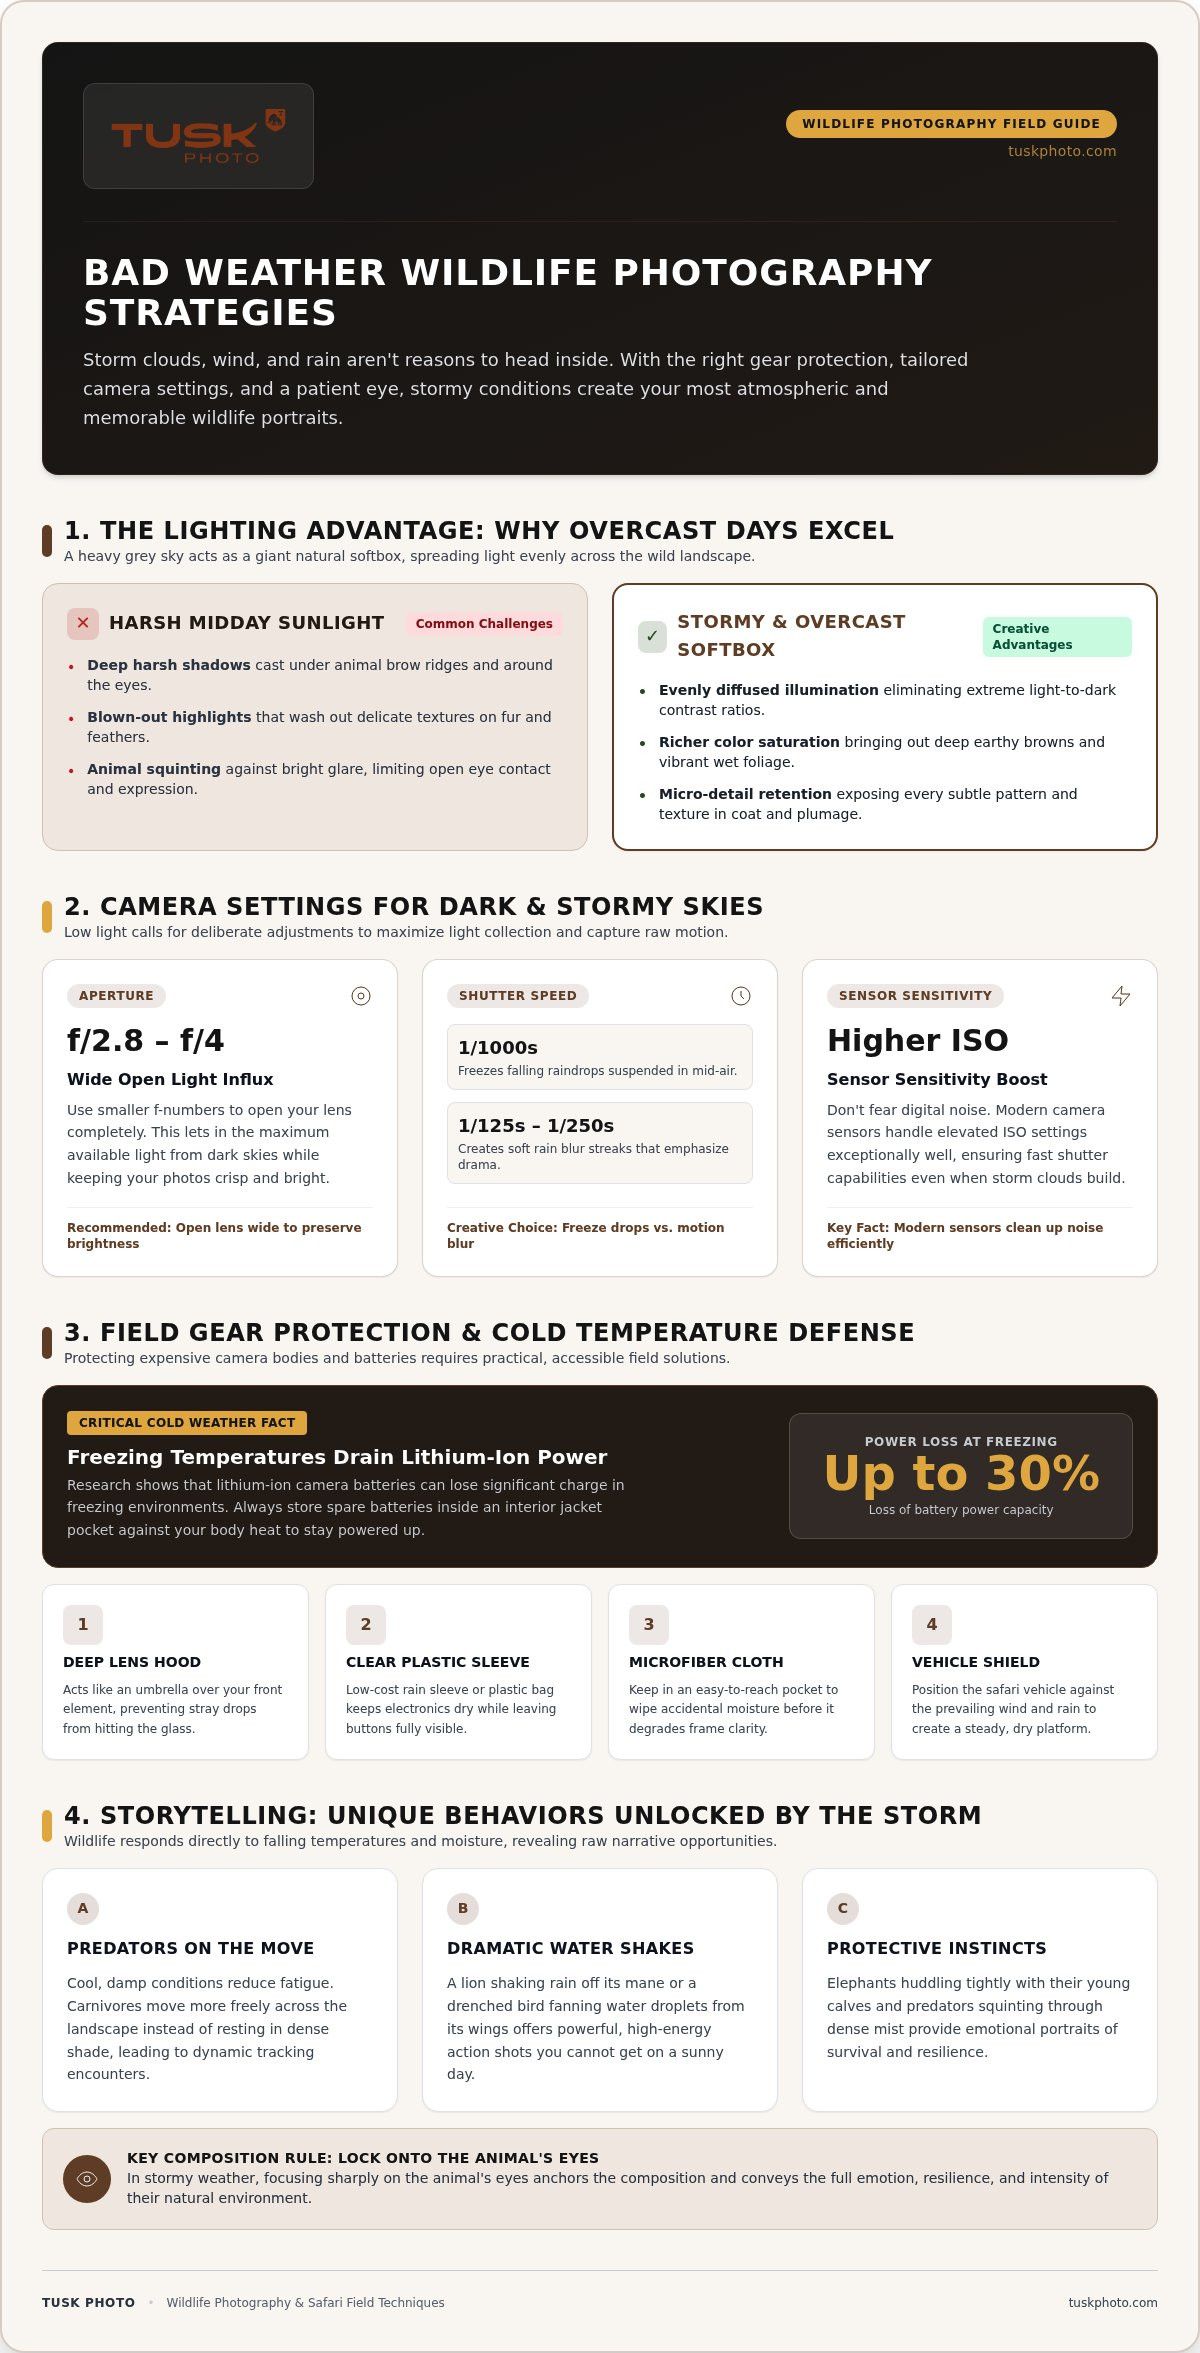
When the clouds block the sun, you need to help your camera "see" better. One of the most practical bad weather wildlife photography strategies is to increase your ISO setting. This makes the sensor more sensitive to light, which is essential when the sky turns dark. Don't be afraid of a little "noise" in your photos. Modern cameras handle it well. You should also choose a wider aperture, which is the smaller f-number on your dial. Opening the lens to f/2.8 or f/4 lets in as much light as possible, helping you keep your images bright and clear.
Experiment with your shutter speed to capture the atmosphere. While a fast speed of 1/1000s freezes falling rain, a slower speed like 1/125s or 1/250s creates a beautiful blur of streaks. This adds a sense of movement and drama that a sunny day simply can't provide. If you want to master these techniques without feeling rushed, a tailor made photography safari gives you the space to practice at your own pace. You'll have an expert mentor by your side to help you dial in the perfect settings for the changing conditions.
Look for the small, emotional moments that only happen during a storm. An elephant huddling with its calf or a predator squinting through the mist tells a rich story of survival and resilience. Focus on the animal's eyes to convey the feeling of the environment. These expressions create a deep connection with anyone who sees your work. On our scheduled departure photography tours, you'll learn how to anticipate these unique behaviors. Capturing a bird shaking water from its wings is a classic shot that proves your bad weather wildlife photography strategies are working perfectly.
Bad weather doesn't have to be a reason to stay inside. By using the right bad weather wildlife photography strategies, you can capture the kind of dramatic, moody shots that sunny days just can't offer. Remember to protect your gear with simple tools and adjust your settings to handle the lower light. These small changes make a massive difference in your results. You'll soon see that a rainy day is just another chance to get creative.
Our journeys offer expert photography hosts on every trip, ensuring you have a mentor to guide you through these challenging moments. With our small groups and global access to rare wildlife encounters, you'll always find the support you need to succeed. Explore our upcoming scheduled tours and capture the wild in any weather! Don't let a few clouds stop you; the best stories are often found right in the middle of the rain.
Yes, it's generally safe if you take basic precautions. Most modern cameras have some weather resistance, but using a dedicated rain sleeve or even a clear plastic bag is much safer. These bad weather wildlife photography strategies protect the sensitive electronics from moisture. Always keep a dry cloth handy to wipe away any stray droplets that land on the camera body or lens.
Lens fogging happens when your gear moves quickly between different temperatures. To avoid this, let your camera sit in its bag for about an hour to adjust to the outside air slowly. For very humid days, using a portable USB lens heater, which usually costs between $20 and $23, can keep the glass at a steady temperature. This prevents condensation from forming and ruining your shot.
Use a clean, dry microfiber cloth to wipe every surface of your camera and lens immediately. It's a good idea to extend any zoom lenses fully to dry the barrels properly. Leave your gear out in a dry room with plenty of air circulation. Avoid using direct heat like blow dryers, as this can cause more harm than good to the delicate internal seals.
You don't need a special flash, but a standard one is a great tool for adding drama. A light pop of flash freezes falling rain or snow, making the weather a visible part of your bad weather wildlife photography strategies. Our guides are always available to help you master these creative lighting techniques while out in the field to ensure you get the best results.


